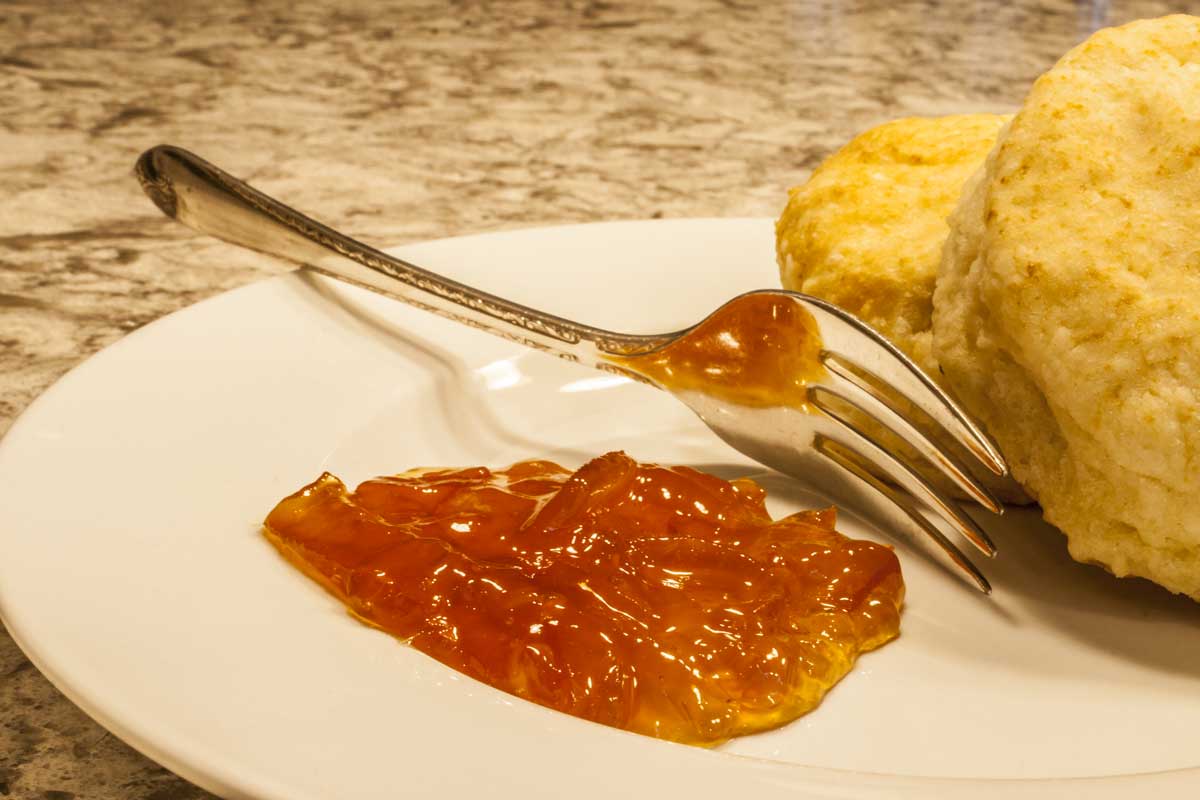
Orange marmalade is my favorite. While we seldom have any sort of jam, jelly or whatnot I'll pretty much pass over any of them if there's no orange marmalade. And I had no idea until recently that my favorite store-bought brand (Dundee) was from the company credited with creating orange marmalade! It's a great story about, well not so much lemons-to-lemonade, but turning the wrong oranges into delectable & perfect orange marmalade.
I've been jonesing to try making marmalade for several months and learned that the quintessential citrus, Seville Oranges, are only in season for a very short period - normally the 3rd and 4th weeks of January. That didn't stop me from nagging the produce folks at Central Market from mid-November. Or, while on our holiday trip to the daughters in Florida, making the rounds of every citrus stand we passed.
When we returned home in January our favorite produce guy at Central Market (who shall remain nameless and blameless) told us that 'something happened' to the Seville Oranges and there would be none this year. I've been grumbling for a month, now.
Sure, there are lots of recipes for substituting plain oranges & various other citrus in attempts to mimic the unique sharpness of Seville Oranges - and I was tempted - but ultimately I resolved that my first-ever canning experiment would wait for the real thing.
Imagine my excitement last week when the hubby pointed out Seville Oranges (at CM!). Granted they are about 3 weeks behind schedule but there they were. After giving the ojo to the produce guy I began filling my basket. I had no idea how many oranges I needed so I just bought all my basket would hold.

16 Seville Oranges
Turns out most recipes call for 5-6 oranges. I have 16.
So, below is a recipe that makes just shy of 2 GALLONS of orange marmalade. Yep, 15 pints. You may want to consider adjusting the recipe to fit your particular level of zeal.
Also, if you know anyone who likes orange marmalade and lives near Austin send them my way.
Ingredients
- 5 pounds Seville Oranges
- 11 pounds 4 ounces granulated sugar
- 3.5 quarts water
Hardware
- Mandoline
- 2 large pots
- 8 quart or larger for cooking the marmalade
- 60 quart for boiling utensils and canning
- canning jars with rings and new lids (15 pint jars for this recipe)
- canning tongs
- canning funnel
- regular tongs
- ladle
- steamer basket (for sterilizing lids)
- magnet thingy (for picking up lids)
- 2 clean salad plates
- 3-4 feet of clean counter space
- 5-6 clean kitchen towels
- kitchen scale
- 25-30 hours (about 2.5 hours active)
This is a recipe you need to prepare for. There are many moving pieces and you need each ready when needed. Make sure you have everything before you start. And, like a birth, you're going to need lots of boiling water.
This is the first time I've ever 'canned' anything and I'll admit I'm still slightly nervous despite reassurances that canning is super easy. I've been told that the sure signs of improperly canned food are:
- A bulging lid or a lid that no longer holds a vacuum (it should not pop up and down - or be pushed up - before the jar is opened)
- A lid that is rusted or corroded
- Food that has seeped under the jar’s lid
- Bubbles in the jar - either before or after you open it
- Mold, odd color or texture
- Anything that doesn't smell like it should
Use your own good judgment. Botulism can kill you. If in doubt throw it out.
Preparation

- Wash your oranges under warm water to remove any wax, debris or schmutz. Remember, you will be eating this part.
- Using a mandoline, slice the oranges into 1/8" slices (.75mm on my mandoline).
- Remove any seeds and seed-bits. The mandoline will julienne seeds into tiny slivers. Seeds never taste good.
- Separate and save the full-on orange peel bits - the stuff from the top and bottom. We'll get to that in a minute.
- Stack the middle sections atop one another and slice into quarters. Place in 8 quart or larger non-reactive (not aluminum) pot.
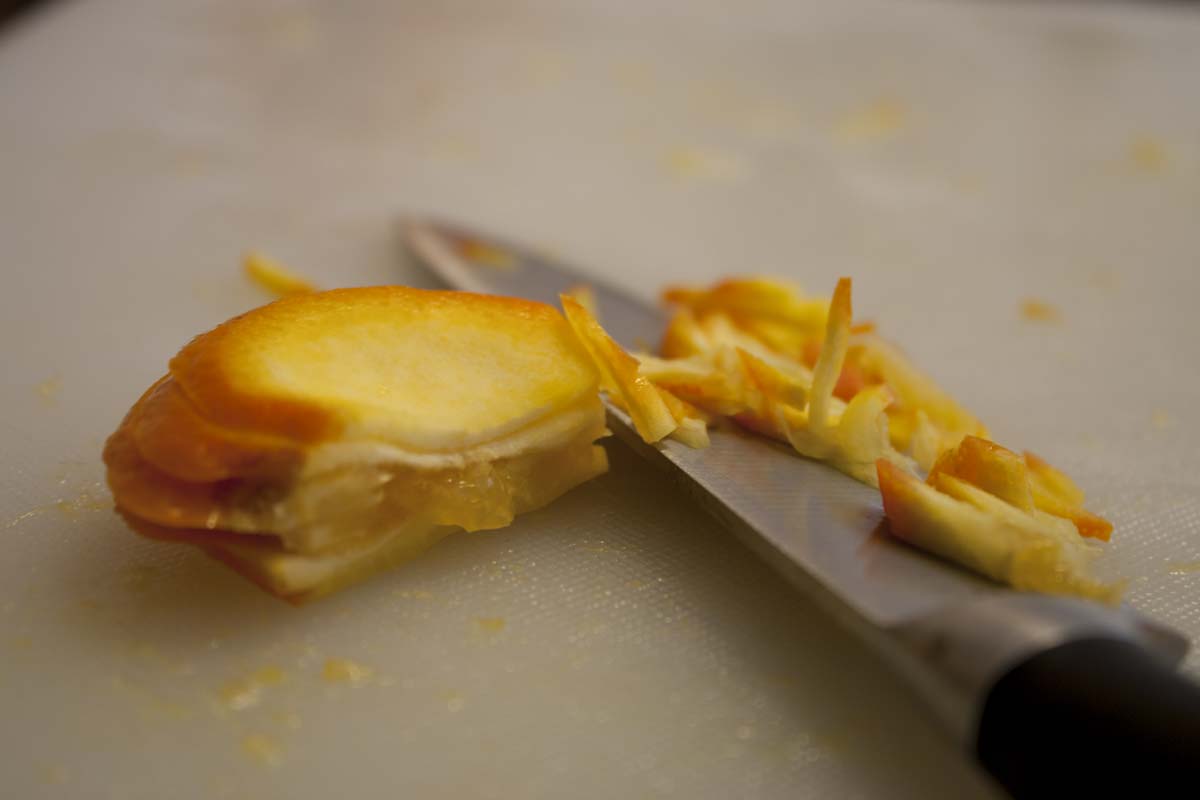
- Collect the top and bottom bits and slice them into 1/8" strips so they're approximately the same thickness and width as the middle pieces. Add these slices to the cooking pot.
- Add 3.5 quarts (14 cups) water, cover, and bring to a boil over medium-high heat.
- Boil for 30 minutes.
- Turn off the heat and allow to cool to room temperature.
- Transfer to refrigerator and let sit overnight to further develop the pectin.
Day 2 - Cooking and Canning
Remove the orange/water mixture to the counter and allow it to come to room temperature while you gather everything else together.
Place your 2 clean salad plates on a flat surface in your freezer.
Prep Your Canning Supplies
- Wash your jars, lids, rings, tongs and tools in warm soapy water. Rinse thoroughly.
- Arrange your jar lids in the steamer basket with the rubber ring facing down.
- Arrange jars & rings in bottom of super-size pot. Place your miscellaneous tools and the steamer full of lids into the pot and add enough water to cover everything. This is just to make sure you have enough water in the pot.
- Remove anything with rubber including your lids.
- Place the monster pot on the stove, cover, and bring to a full rolling boil.
- Boil for at least 10 minutes.
- Turn off heat, add any reserved rubber-containing tools and your steamer basket of jar lids, cover and leave undisturbed while you cook the marmalade.

I added another 3 gallons of water after this photo was taken and before I started heating the pot.

Various canning utensils. The items with rubber on them (lids, jar tongs, funnel, and magnet thingy) are not boiled but placed in the pot after the heat is turned off.
Cooking the marmalade

- Place pot with oranges and water on the stovetop, set heat to medium-high and bring to a boil.
- Stir in sugar ensuring the sugar doesn't clump and settle on the bottom of the pot. Stir thoroughly to mix completely.
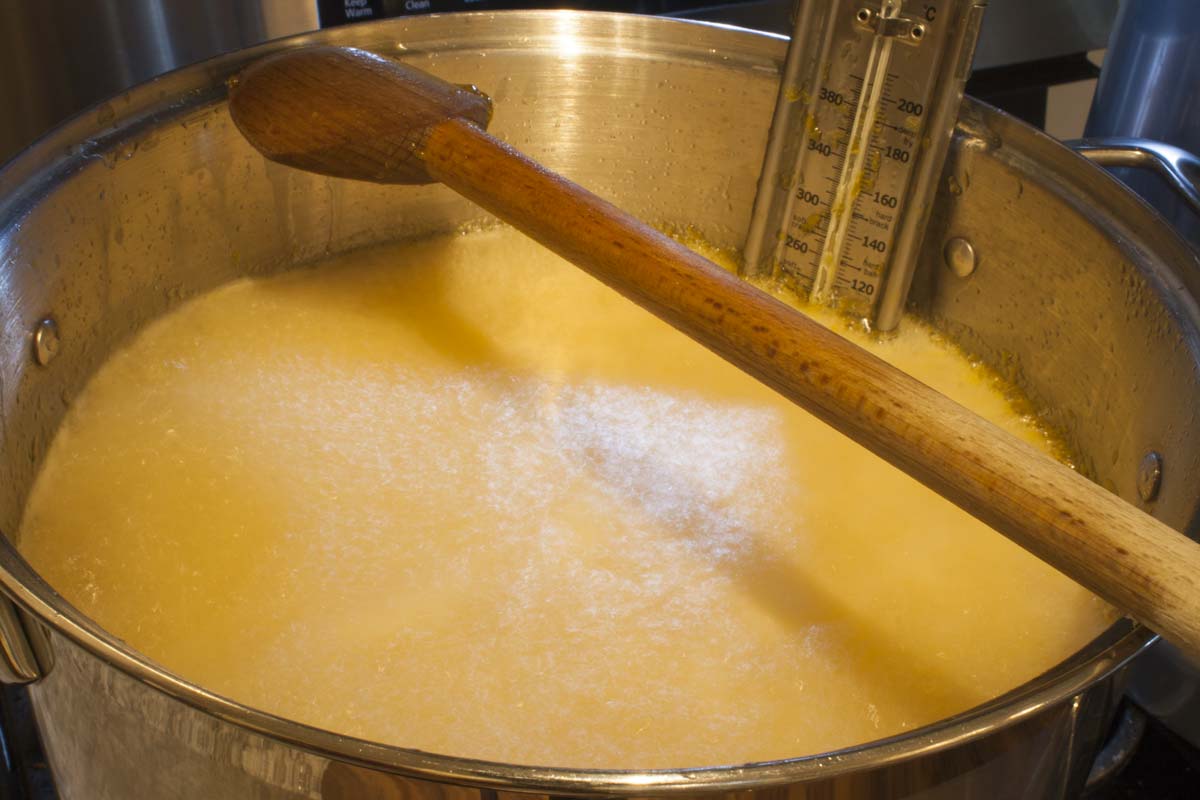
- Bring orange marmalade to a boil over medium high heat WITHOUT STIRRING.
- When mixture reaches 222°F (the top will turn palest orange) boil for 15-20 minutes.
- After 15 minutes, remove a salad plate from the freezer, spoon 1 teaspoon of marmalade mixture onto plate and return to freezer for 60 seconds.
- Remove the re-chilled plate from the freezer and tilt at a 45° angle.
- Marmalade is done if it stays pretty much in place. (wish I'd taken a photo for you)
- If a thin stream of marmalade runs down the plate continue boiling and check every 10 minutes.
Rinse, dry and return your plate to the freezer if you need to continue cooking. Rotate plates so you're always using the coldest one for testing.
Because I prepared such a huge volume of marmalade I had to boil for ~35 minutes before the mixture was done.
Canning
- Turn marmalade off.
- Using your sterilized tongs remove your lids and other tools from the top of the boiling pot without touching the lids or funnel with your filthy hands. Arrange on a clean dry towel.
- Using your sterilized jar lifter, drain and remove canning jars to a clean dry spot to drain.
Leave the jars upside down until just before you fill them.
- Place your sterilized canning funnel into the mouth of a canning jar.
- Using your sterilized ladle, fill the jar to just below the threads on the jar.
- Remove the funnel and place in the mouth of the next sterilized jar.
Never place the funnel on the counter to wait. Always from sterilized location to sterilized location.
- Using a fresh, clean, damp towel wipe the threads and rim of the filled jar.
- Using your sterilized magnet thingy lift a single canning lid and place it, without touching the sides or bottom with your filthy disease-ridden hands, on top of the filled jar.
- Place your finger on the top of the lid & remove the magnet.
- Moving your finger only long enough to get it through the hole in the ring, screw the canning ring onto the jar. But only lightly finger tight.
You don't want to crank the ring on at this point. Air will be expelled from the jar during the sterilizing process and a tightly closed jar will explode.

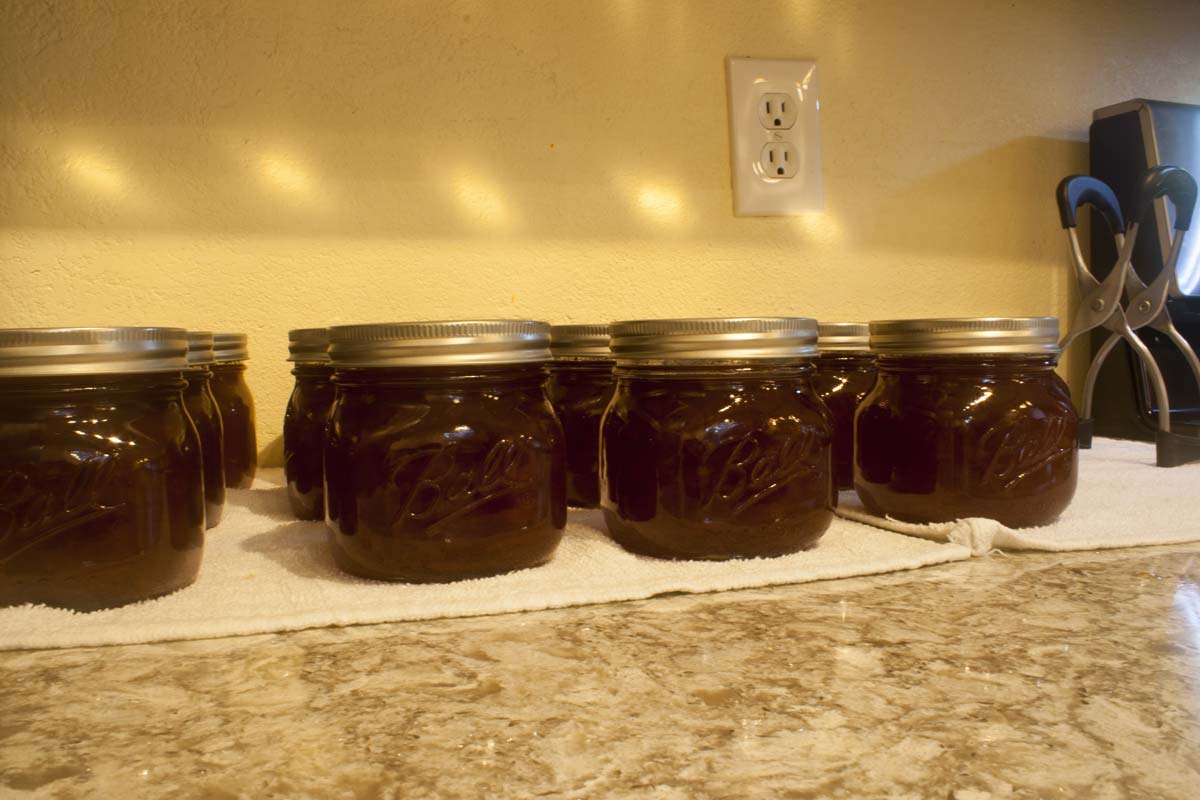
- Continue filling and covering the jars until you've used all the marmalade.
- Using your jar lifter arrange your jars in the bottom of the sterilizing pot. Be sure the jars are not touching one another, the bottom, or the sides of the pot.
- Place the lid on the sterilizing pot, turn the heat back up, bring to a boil, and boil for 10 minutes.
- Turn off the heat, carefully remove the lid.
- Using your jar lifter carefully remove each jar to a clean dry location taking care not to disturb the rings or lid.
You should hear each lid 'plink' as the jar cools and vacuum seals the lid.
- Leave undisturbed for 24 hours.
- After 24 hours lightly tighten the rings on each jar and store in a cool place.
The rings are really used at this point to keep the lids from being knocked off in storage. I know several people who remove the rings and use them for the next canning batch. My confidence level is not there - yet.
Marmalade should last for about 6 months. Again, approach home-canned goods with appropriate caution and...if in doubt throw it out!
I love orange marmalade, too!
Do you still have any? And is the offer still open?
Do you know if Seville oranges are available now? (March 24)
Carrie,
First, we are in Manhattan now so while the offer still stands that may be too far to drive for marmalade. And I picked up the last of the Seville oranges at Eataly about 2 weeks ago: and they were pretty old. I think the Seville season is over.